Dealing with a Frozen Drain Pipe Solutions and Prevention

Dealing with a Frozen Drain Pipe Solutions and Prevention

Dealing with a Frozen Drain Pipe: Solutions and Prevention

Understanding the Problem: What Causes a Frozen Drain Pipe?

During cold winter months, drain pipes in homes can freeze due to exposure to low temperatures. This occurs when water in the pipes freezes, blocking the flow and causing potential damage. Several factors contribute to this, including inadequate insulation, exposure to cold drafts, and poor drainage system design.

Identifying Signs of a Frozen Drain Pipe

Recognizing the signs of a frozen drain pipe is crucial for prompt action. Common indicators include slow or halted drainage, gurgling noises from drains, foul odors, and visible frost or ice buildup on pipes. If you notice any of these symptoms, it’s essential to address the issue promptly to prevent further complications.

Thawing a Frozen Drain Pipe: Safe and Effective Methods

When dealing with a frozen drain pipe, it’s essential to thaw it safely to avoid causing damage to the pipes or exacerbating the problem. Several methods can be used to thaw a frozen drain pipe, including applying heat with a hairdryer or heat lamp, using hot water bottles or heating pads, or wrapping the pipes with heated towels or electric heat tape. Exercise caution and avoid using open flames or excessive heat to prevent accidents.

Preventing Future Freezing: Tips for Pipe Protection

Prevention is key to avoiding the hassle and expense of dealing with frozen drain pipes. Start by insulating exposed pipes with foam pipe insulation or heating cables to provide an additional barrier against the cold. Seal any gaps or cracks in walls, floors, or ceilings to prevent cold drafts from reaching the pipes. Additionally, consider installing thermostatically controlled heating cables or heat trace systems for added protection during extreme cold spells.

Maintaining Proper Temperature: Keeping Pipes Warm

Maintaining a consistent temperature within your home is essential for preventing frozen drain pipes. During cold weather, keep interior doors open to promote air circulation and prevent cold spots in less frequently used areas. Set your thermostat to a consistent temperature, even when away from home, to ensure pipes remain warm enough to prevent freezing. Consider using space heaters in unheated areas or those prone to freezing, such as basements or crawl spaces.

Inspection and Maintenance: Regular Checks for Peace of Mind

Regular inspection and maintenance of your plumbing system can help identify and address potential issues before they escalate into larger problems. Schedule annual inspections with a licensed plumber to check for signs of wear or damage, ensure proper insulation and ventilation, and address any concerns promptly. Additionally, perform routine maintenance tasks such as clearing debris from drains and gutters to prevent blockages that can contribute to freezing.

Emergency Preparedness: Having a Plan in Place

In the event of a frozen drain pipe, it’s essential to have an emergency plan in place to minimize damage and disruption to your home. Keep a supply of emergency plumbing tools and materials on hand, including pipe insulation, heat tape, and a hairdryer or heat lamp. Familiarize yourself with the

Plumbing Solutions Made Easy with Home Depot Pipes

Plumbing Solutions Made Easy with Home Depot Pipes

Expert Tips for DIY Pipe Projects at Home Depot

Introduction:
Embarking on a do-it-yourself (DIY) pipe project can be both exciting and daunting. However, with the right guidance and resources, it can also be immensely rewarding. Home Depot stands as a haven for DIY enthusiasts, offering a plethora of options for all your plumbing needs. Here, we delve into expert tips and tricks to ensure your DIY pipe projects at Home Depot are a resounding success.

Navigating the Aisles:
One of the initial challenges when stepping into Home Depot is navigating through the aisles of pipes and fittings. It can feel overwhelming with the vast array of options available. However, fear not! Take your time to familiarize yourself with the layout, and don’t hesitate to seek assistance from the knowledgeable staff members roaming the aisles. They’re there to guide you towards the perfect pipe for your project.

Choosing the Right Materials:
Selecting the right materials is crucial for the success of your DIY pipe project. Home Depot offers a wide selection of pipes made from various materials such as PVC, copper, and galvanized steel, each with its unique properties and applications. Consider factors like durability, flexibility, and compatibility with your existing plumbing system when making your choice.

Planning Your Project:
Before diving into your DIY pipe project, take the time to plan meticulously. Measure twice, cut once, as they say! Sketch out your design, taking into account all the necessary fittings and connections. Proper planning not only ensures a smoother execution but also helps in avoiding costly mistakes along the way.

Essential Tools of the Trade:
Having the right tools on hand is essential for any DIY endeavor, and pipe projects are no exception. At Home Depot, you’ll find a comprehensive selection of tools specifically designed for plumbing tasks. From pipe cutters and wrenches to soldering kits and thread sealant, make sure you have everything you need before getting started.

Safety First:
When working with pipes and plumbing fixtures, safety should always be a top priority. Remember to wear appropriate protective gear, such as gloves and safety glasses, to prevent accidents and injuries. Take extra precautions when using tools like soldering irons or power saws, and always follow manufacturer instructions and safety guidelines.

Mastering Installation Techniques:
Proper installation techniques are crucial for ensuring the longevity and functionality of your plumbing system. Whether you’re soldering copper pipes, gluing PVC joints, or threading galvanized steel, it’s essential to follow best practices to achieve leak-free connections. Home Depot offers plenty of resources, including how-to guides and instructional videos, to help you master these techniques.

Troubleshooting and Problem-Solving:
Despite careful planning and execution, unexpected challenges may arise during the course of your DIY pipe project. Don’t panic! Home Depot’s team of experts is available to assist you in troubleshooting any issues you encounter along the way. Whether it’s a stubborn leak or a fitting that just won’t cooperate, rest assured that there’s a solution waiting to be found.

Embracing Creativity:
While functionality is paramount

House Repair Made Easy Proven Strategies for Every Homeowner

House Repair Made Easy Proven Strategies for Every Homeowner

Expert Tips for Effective Home Repair

Introduction:
In the realm of homeownership, encountering the occasional repair is inevitable. Whether it’s a leaky faucet, a creaky floorboard, or a faulty electrical outlet, knowing how to tackle these issues can save both time and money. With the right guidance and tools, even the most daunting repairs can be approached with confidence.

Understanding the Basics:
Before diving into any repair project, it’s essential to understand the basics. Familiarize yourself with common household tools and their uses. From screwdrivers and wrenches to pliers and hammers, having the right tools on hand can make all the difference. Additionally, take the time to learn about basic safety protocols to prevent accidents and injuries.

Assessing the Situation:
Once you’ve equipped yourself with the necessary knowledge and tools, the next step is to assess the situation. Identify the root cause of the problem and determine the extent of the damage. Is it a simple fix that you can tackle on your own, or does it require professional intervention? By accurately assessing the situation, you can make informed decisions about the best course of action.

Gathering Resources:
Before embarking on any repair project, it’s crucial to gather all the necessary resources. This includes not only tools and materials but also instructional guides or online tutorials if needed. Having everything you need within reach will streamline the repair process and minimize interruptions. Additionally, don’t hesitate to seek advice or assistance from knowledgeable friends or family members.

Taking a Methodical Approach:
When it comes to home repair, patience is key. Take a methodical approach to the task at hand, following a step-by-step process to ensure accuracy and efficiency. Rushing through a repair can lead to costly mistakes and potentially exacerbate the problem. Instead, proceed carefully, double-checking your work along the way to ensure everything is in order.

Seeking Professional Help When Needed:
While many home repairs can be tackled independently, there are times when it’s best to seek professional help. Complex issues such as electrical work or structural damage should be left to qualified professionals who have the expertise and experience to handle them safely and effectively. Don’t hesitate to enlist the help of a professional when the situation warrants it.

Preventative Maintenance:
In addition to addressing existing issues, it’s essential to prioritize preventative maintenance to avoid future problems. Regularly inspecting key areas of your home, such as plumbing, HVAC systems, and roofing, can help identify potential issues before they escalate into costly repairs. Implementing a preventative maintenance schedule can save you both time and money in the long run.

Staying Informed:
The world of home repair is constantly evolving, with new techniques and technologies emerging all the time. Stay informed by reading up on the latest trends and developments in the field. Attend workshops or seminars, and don’t hesitate to experiment with new tools or methods in a controlled environment. By staying abreast of industry trends, you can become a more effective and knowledgeable homeowner.

Conclusion:
In conclusion, effective home

Transform Your Space Budget-Friendly Home Renovations

Transform Your Space Budget-Friendly Home Renovations

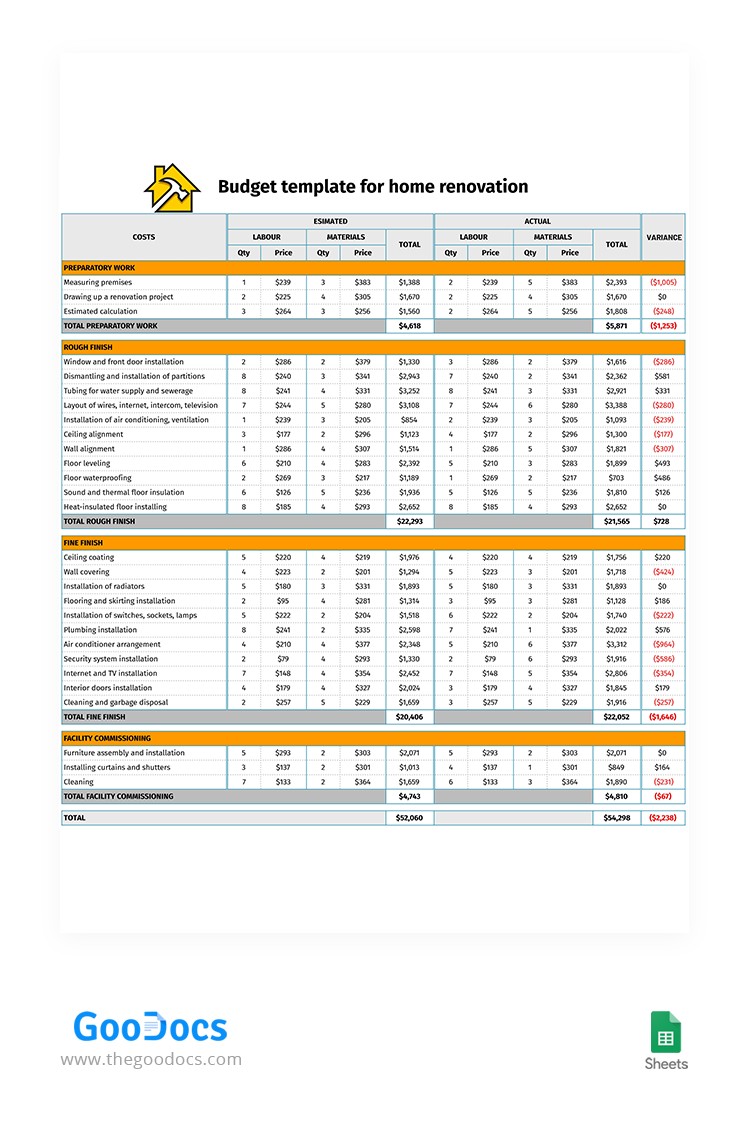
Are you dreaming of transforming your home but worried about the costs? Fear not, because budget home renovation is entirely feasible with the right approach. Let’s explore some savvy strategies and creative ideas to revamp your space without breaking the bank.

Setting Your Budget

Before diving into any renovation project, it’s crucial to establish a realistic budget. Take stock of your finances and determine how much you can comfortably afford to spend on renovations. Factor in both essential upgrades and any optional luxuries you might desire. Having a clear budget in mind will help you prioritize expenses and make informed decisions throughout the renovation process.

Prioritizing Renovation Needs

With a limited budget, it’s essential to prioritize your renovation needs wisely. Identify areas of your home that require immediate attention or will deliver the most significant impact on your daily life. Focus on essential upgrades such as fixing structural issues, addressing safety concerns, or improving energy efficiency before tackling purely cosmetic enhancements. By prioritizing your renovation needs, you can make the most of your budget and ensure that your investment delivers maximum value.

DIY vs. Hiring Professionals

One of the most effective ways to save money on home renovations is by taking a hands-on approach and tackling some tasks yourself. DIY projects can range from painting walls and installing flooring to minor repairs and cosmetic upgrades. However, it’s essential to be realistic about your skills and limitations. Some projects are best left to the professionals to avoid costly mistakes and ensure high-quality results. Consider hiring contractors for complex tasks or those requiring specialized knowledge, such as electrical or plumbing work.

Exploring Cost-Effective Materials and Finishes

When it comes to budget home renovation, choosing cost-effective materials and finishes can make a significant difference in your overall expenses. Opt for durable, low-maintenance materials that offer excellent value for money, such as laminate flooring, affordable countertops, and budget-friendly fixtures. Explore discount stores, clearance sales, and online marketplaces to find quality materials at discounted prices. With a bit of research and creativity, you can achieve a stylish look for less without compromising on quality.

Maximizing Space and Functionality

A budget-friendly renovation isn’t just about aesthetics; it’s also about enhancing the functionality and livability of your space. Look for innovative ways to maximize space and make the most of what you have. Consider open shelving, multi-functional furniture, and clever storage solutions to optimize every inch of your home. By improving functionality and organization, you can create a more comfortable and enjoyable living environment without the need for extensive renovations.

Repurposing and Upcycling

Another eco-friendly and budget-friendly approach to home renovation is repurposing and upcycling existing materials and furnishings. Get creative with DIY projects that breathe new life into old items, such as refurbishing furniture, repainting cabinets, or repurposing salvaged materials. Not only does upcycling save money, but it also adds character and personality to your home. Plus, it’s a great way to reduce waste and minimize your environmental footprint.

Planning for Future Upgrades

While focusing on

Unleash Your Creativity with Handyman Home Upgrades

Unleash Your Creativity with Handyman Home Upgrades

Expert Handyman Tips for Home Improvement Success

Introduction:
Embarking on a home improvement project can be both exciting and daunting. Whether you’re tackling a small repair or a major renovation, having the right tips and tricks up your sleeve can make all the difference. In this article, we’ll explore some expert handyman advice to help you achieve success with your home improvement endeavors.

Planning and Preparation:
Before diving into any home improvement project, it’s crucial to start with a solid plan. Take the time to assess the scope of the project, set a realistic budget, and gather all necessary materials and tools. Planning ahead will save you time, money, and headaches down the road. Additionally, don’t forget to obtain any necessary permits or permissions before getting started.

Safety First:
When it comes to home improvement, safety should always be a top priority. Before beginning any work, be sure to familiarize yourself with proper safety procedures and equipment. This includes wearing protective gear such as gloves, goggles, and masks, as well as using tools and equipment correctly to avoid accidents or injuries. Remember, it’s better to be safe than sorry.

Start Small:
If you’re new to home improvement projects, it’s wise to start small and work your way up to more complex tasks. Begin with simple repairs or upgrades, such as painting a room or fixing a leaky faucet, before tackling larger renovations. Starting small will help you gain confidence and skills that you can apply to bigger projects in the future.

DIY vs. Hiring a Pro:
One of the biggest decisions you’ll face during a home improvement project is whether to do it yourself or hire a professional. While DIY projects can be rewarding and cost-effective, some tasks may require the expertise of a skilled handyman or contractor. Consider factors such as your level of experience, the complexity of the project, and your available time and resources before making a decision.

Budget-Friendly Solutions:
Home improvement doesn’t have to break the bank. There are plenty of budget-friendly solutions and DIY hacks that can help you achieve the look and functionality you desire without spending a fortune. From upcycling old furniture to shopping for materials at thrift stores or online marketplaces, getting creative with your resources can save you money while still delivering impressive results.

Attention to Detail:
When it comes to home improvement, the devil is in the details. Paying attention to small details such as paint finishes, hardware selection, and trim work can elevate the overall look and feel of a space. Take the time to ensure that every aspect of your project is executed with precision and care for a polished end result that you can be proud of.

Sustainable Practices:
In today’s world, sustainability is more important than ever. When planning your home improvement projects, consider incorporating eco-friendly practices and materials wherever possible. This could include using energy-efficient appliances, installing low-flow plumbing fixtures, or choosing sustainable building materials such as bamboo flooring or reclaimed wood.

Maintenance and Upkeep:

Beginner’s Guide Renovating Your Home Without Experience

Beginner’s Guide Renovating Your Home Without Experience

Beginner’s Guide: Renovating Your Home Without Experience

Embarking on the Renovation Journey

So, you’ve decided it’s time to breathe new life into your home. Whether it’s outdated décor, cramped spaces, or just a desire for change, embarking on a renovation journey can be both exciting and daunting, especially if you’re a beginner with no prior experience in the realm of home improvement.

Educate Yourself

Before picking up that hammer or paintbrush, take some time to educate yourself about the renovation process. There are countless resources available online, from tutorials and DIY blogs to instructional videos. Familiarize yourself with basic terminology, tools, and techniques to build confidence and set realistic expectations for your project.

Start Small

As a beginner, it’s important to start small and tackle manageable projects before diving into major renovations. Consider beginning with a room that requires minimal work, such as a bathroom or spare bedroom. This will allow you to gain hands-on experience and develop your skills without feeling overwhelmed.

Plan Thoroughly

A successful renovation project starts with thorough planning. Take the time to envision your desired outcome and create a detailed plan outlining each step of the process. Consider factors such as budget, timeline, and desired aesthetics. Planning ahead will help minimize unexpected surprises and ensure a smoother renovation journey.

Set a Realistic Budget

Renovating can be costly, so it’s essential to set a realistic budget from the outset. Consider all potential expenses, including materials, labor, permits, and unforeseen costs. Be prepared to prioritize your renovation needs and make adjustments as needed to stay within budget constraints.

Gather the Right Tools and Materials

Having the right tools and materials on hand is essential for a successful renovation project. Invest in quality tools that will last and consider renting or borrowing specialized equipment for larger projects. Research and purchase materials that align with your vision and budget, and don’t forget to factor in delivery times to avoid delays.

Take Safety Precautions

Safety should always be a top priority when renovating your home, especially as a beginner. Familiarize yourself with basic safety practices and guidelines, such as wearing protective gear, using tools correctly, and working in well-ventilated areas. Don’t hesitate to seek professional assistance for tasks that pose a safety risk.

Seek Expert Advice When Needed

While DIY renovation projects can be fulfilling, there may be times when it’s best to seek expert advice or assistance. Don’t hesitate to consult with professionals, such as contractors, architects, or interior designers, for guidance on more complex projects or when faced with unfamiliar challenges.

Embrace Mistakes as Learning Opportunities

It’s inevitable that you’ll encounter challenges and make mistakes along the way, especially as a beginner. Instead of becoming discouraged, embrace these moments as valuable learning opportunities. Reflect on what went wrong, adjust your approach as needed, and carry forward with newfound knowledge and confidence.

Celebrate Your Achievements

Finally, don’t forget to celebrate your achievements along the way. Each milestone reached and project completed is a testament to your hard work and

Mastering Home Repair Expert Advice and Techniques

Mastering Home Repair Expert Advice and Techniques

Essential Home Repair Tips for Every Homeowner

Understanding the Basics

When it comes to maintaining your home, having a basic understanding of home repair is crucial. From fixing leaky faucets to patching up drywall, knowing how to tackle common issues can save you time, money, and frustration in the long run.

Investing in the Right Tools

Having the right tools on hand is essential for any home repair project. Invest in a quality toolbox equipped with essentials such as a hammer, screwdrivers, wrenches, pliers, and a tape measure. Additionally, consider adding specialty tools like a stud finder, level, and pipe wrench to your arsenal for more specific tasks.

Identifying Common Issues

Many home repair issues are relatively common and can be easily addressed with the right knowledge and tools. These include leaky faucets, clogged drains, squeaky doors, and cracked tiles. By learning how to identify and address these issues promptly, you can prevent them from escalating into larger problems down the road.

Learning from Online Resources

The internet is a treasure trove of resources for homeowners looking to tackle home repairs themselves. From step-by-step tutorials and instructional videos to forums and blogs, there is no shortage of information available to help guide you through the process. Take advantage of these resources to expand your knowledge and gain confidence in your abilities.

Starting Small

If you’re new to home repair, it’s wise to start small and gradually work your way up to more complex projects. Begin with simple tasks like replacing light fixtures, fixing loose hinges, or patching up small holes in the wall. As you gain experience and confidence, you can gradually take on more challenging projects.

Knowing When to Call a Professional

While many home repairs can be tackled DIY-style, there are certain situations where it’s best to call in a professional. This includes projects that involve electrical work, plumbing, or structural repairs, as well as tasks that require specialized tools or expertise. Knowing when to seek professional help can save you time, money, and potential safety hazards.

Regular Maintenance is Key

Prevention is often the best form of home repair. By staying on top of regular maintenance tasks such as cleaning gutters, inspecting roofing, and servicing HVAC systems, you can identify and address potential issues before they escalate into costly repairs. Establishing a regular maintenance schedule can help keep your home in tip-top shape year-round.

Safety First

Safety should always be a top priority when tackling home repair projects. Familiarize yourself with basic safety practices and guidelines, such as wearing protective gear, using tools correctly, and working in well-ventilated areas. If you’re unsure about how to safely complete a task, don’t hesitate to seek guidance from a professional.

Taking Pride in Your Home

Ultimately, home repair isn’t just about fixing things – it’s about taking pride in your home and ensuring it remains a safe, comfortable, and functional space for you and your family. By learning basic home repair skills and staying proactive about maintenance, you can preserve

Renovation Project Ideas Transform Your Space with Creativity

Renovation Project Ideas Transform Your Space with Creativity

Unleashing Creativity: Renovation Project Ideas

Renovation project ideas are the fuel that ignites the flames of creativity, offering homeowners a canvas upon which to express their unique vision and style. From minor updates to major transformations, the possibilities are endless when it comes to breathing new life into your space.

Revamp Your Kitchen

The kitchen is often considered the heart of the home, making it an ideal space for renovation. Consider updating outdated cabinets with fresh paint or modern hardware, replacing worn countertops with sleek quartz or granite, and installing energy-efficient appliances to enhance both functionality and style. Adding a statement backsplash or upgrading lighting fixtures can further elevate the space, creating a culinary haven that is as beautiful as it is functional.

Transform Your Bathroom

Transforming your bathroom can add both luxury and value to your home. Consider replacing old fixtures with sleek, modern alternatives, such as rainfall showerheads or freestanding tubs. Updating flooring with durable and stylish materials like porcelain tile or luxury vinyl can instantly modernize the space, while installing a new vanity with ample storage can enhance organization and functionality. Don’t forget to add luxurious touches like heated floors or towel warmers for added comfort and indulgence.

Create an Outdoor Oasis

Outdoor spaces offer endless opportunities for renovation and transformation. Consider adding a deck or patio for outdoor entertaining, complete with comfortable seating and a built-in grill or kitchen area. Incorporating landscaping elements like flower beds, trees, and shrubs can add color and texture to your outdoor oasis, while features like fire pits or water features can create a cozy ambiance. Don’t forget to add lighting to extend the usability of your outdoor space into the evening hours.

Open Up Your Floor Plan

Open floor plans are a popular renovation trend that can create a sense of space and flow in your home. Consider removing non-load-bearing walls to open up the layout and allow for better connectivity between living spaces. This can create a more modern and inviting atmosphere, perfect for entertaining guests or simply enjoying time with family. Be sure to consult with a structural engineer or contractor to ensure that any modifications to your floor plan are safe and structurally sound.

Incorporate Smart Home Technology

Integrating smart home technology into your renovation project can add convenience, comfort, and efficiency to your daily life. Consider installing smart thermostats, lighting systems, or security cameras to enhance energy efficiency and home security. Smart appliances like refrigerators or ovens with built-in Wi-Fi connectivity can offer added convenience and control, allowing you to monitor and manage your home from anywhere.

Embrace Eco-Friendly Design

Green renovation practices not only benefit the environment but can also result in long-term cost savings and improved indoor air quality. Consider using sustainable materials like bamboo flooring, recycled glass countertops, or low-VOC paints and finishes. Installing energy-efficient windows, insulation, and appliances can also reduce your home’s carbon footprint and energy bills. Incorporating natural elements like reclaimed wood or stone can further enhance the eco-friendly appeal

Creative Upcycled Furniture Ideas: Revitalize Your Space

Creative Upcycled Furniture Ideas: Revitalize Your Space

Creative Upcycled Furniture Ideas: Revitalize Your Space

Upcycling furniture breathes new life into old pieces, offering both eco-friendly solutions and unique decor options for your space. Here are some innovative ideas to transform your old furniture into stunning, functional pieces.

Repurposing Vintage Finds

Vintage pieces hold charm and history but might need a little love to fit into your modern space. Consider sanding and refinishing an old dresser or adding new upholstery to a vintage armchair. Repurposing these pieces not only preserves their character but also gives them a fresh, contemporary look.

Pallet Furniture Innovations

Pallets are versatile materials for upcycling. Create a rustic coffee table by stacking and securing pallets, or fashion a wall-mounted shelf for decorative displays. Sanding and staining can transform rough pallet wood into elegant furniture pieces.

Decoupage Magic

Decoupage offers a world of possibilities for revamping furniture. Apply decorative paper or fabric with adhesive to a table or cabinet surface, then seal it with varnish for a unique, customized look. This technique allows for endless creativity and personalization.

For more inspiring and detailed tips on Upcycled Furniture Ideas, visit nolvamedblog.com. This resource delves deeper into creative upcycling methods and offers a wealth of innovative ideas.

Transforming with Paint

A fresh coat of paint can work wonders in upcycling furniture. Experiment with bold colors or opt for a distressed finish by sanding edges after painting. Whether it’s an old chair, table, or dresser, a new paint job can completely redefine its aesthetic.

Reviving with Reupholstery

Consider reupholstering worn-out chairs or sofas with new fabric to instantly rejuvenate their appearance. Mixing and matching fabrics or opting for vibrant patterns can breathe life into tired furniture pieces, making them focal points in your space.

Multipurpose Furniture Design

Maximize functionality by repurposing furniture for dual uses. Convert an old ladder into a bookshelf, or turn wooden crates into storage ottomans. Multipurpose designs not only save space but also add a unique touch to your decor.

Innovative Hardware Updates

Small changes like updating hardware can significantly impact the look of furniture. Replace knobs, handles, or drawer pulls with stylish alternatives to give cabinets and dressers a modern twist.

Sustainable Materials Integration

Integrate sustainable materials into your upcycled furniture projects. Incorporate reclaimed wood, salvaged metal, or eco-friendly paints and finishes. Not only does this contribute to sustainability efforts, but it also adds character to your creations.

Embrace Creative Imperfections

Part of the beauty of upcycled furniture lies in its imperfections. Embrace quirks and irregularities, as they often add charm and uniqueness to your pieces.

With these creative upcycling ideas, you can transform old, forgotten furniture into remarkable pieces that complement your space while contributing to a sustainable lifestyle. Explore your creativity and give new life to your home with these innovative approaches to upcycled furniture.

Effortless Tricks for Easy Wallpaper Removal

Effortless Tricks for Easy Wallpaper Removal

Effortless Tricks for Easy Wallpaper Removal

Wallpapers can add character and charm to a room, but when it’s time for a change, removing them can be a daunting task. However, with the right hacks, this process can become surprisingly manageable. Here are some effective methods to ease the burden of wallpaper removal.

Preparation Is Key

Before diving into the removal process, prepare the area meticulously. Cover the floors with drop cloths or old sheets to catch any falling debris. Additionally, remove any furniture or obstacles that might hinder your workspace. This preparation not only ensures a cleaner removal but also makes the entire process smoother and more efficient.

Test a Hidden Spot

Wallpapers can react differently based on their age, type, and adhesive used. It’s wise to test a small, inconspicuous area first to determine the best removal method. This test spot will give you insights into how the wallpaper reacts to various techniques, allowing you to choose the most effective approach without damaging the entire wall.

Steam Power

One of the most effective ways to loosen wallpaper is by using steam. A handheld steamer can help penetrate the adhesive, making it easier to peel off the wallpaper. Simply run the steamer over small sections of the wallpaper and gently scrape it off with a putty knife or a wallpaper scraper. The steam will work wonders in softening the adhesive, allowing for easier removal.

DIY Solutions

Creating your own wallpaper removal solution can be both cost-effective and efficient. A mixture of equal parts hot water and vinegar or hot water and fabric softener can work wonders in loosening wallpaper. Apply the solution with a sponge or spray bottle onto the wallpaper, allowing it to soak in for a few minutes before attempting to remove the wallpaper.

Peel-and-Strip Technique

Some wallpapers are designed to be peelable, where you can simply remove the top layer, leaving the backing on the wall. If your wallpaper is peelable, carefully lift a corner and slowly peel it off at a 10-15 degree angle. In case the top layer peels away but leaves the backing, use a mixture of water and dish soap to soften the adhesive and gently scrape off the remaining backing.

For more in-depth guidance on wallpaper removal hacks and additional tips, check out Wallpaper Removal Hacks. This resource offers a comprehensive guide and more insights into effectively tackling wallpaper removal challenges.

Patience Pays Off

Lastly, patience is key when removing wallpaper. Rushing the process can damage the wall underneath or lead to a more laborious removal. Take your time, be gentle yet persistent, and the wallpaper will eventually come off, leaving behind a clean surface for your next design endeavors.

With these hacks and a bit of perseverance, you can transform the daunting task of wallpaper removal into a manageable project, readying your space for a fresh, new look.

DIY Electrical: Safe Repair Methods Safely handle electrical

DIY Electrical: Safe Repair Methods Safely handle electrical

DIY Electrical: Safe Repair Methods

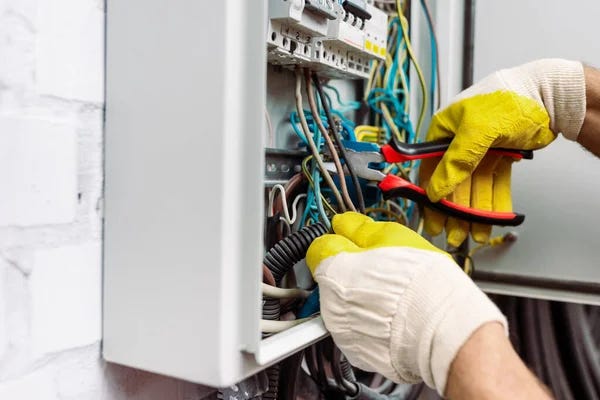
Handling electrical repairs at home requires caution and expertise. While some minor fixes are feasible, safety should always be the priority. Understanding safe repair methods empowers homeowners to tackle certain electrical issues effectively.

Assessing the Issue

Before attempting any DIY electrical repair, assess the issue thoroughly. Determine the nature and scope of the problem. For complex issues or if unsure, it’s safer to seek professional help.

For more insights into DIY Electrical Repairs, visit nolvamedblog.com. This resource offers comprehensive guidance on safely handling electrical repairs at home.

Safety Precautions

Prioritize safety measures when dealing with electrical repairs. Turn off the power supply to the area where the repair will take place. Use insulated tools and wear appropriate safety gear like gloves and goggles.

Understanding Circuits

Educate yourself about the electrical circuits in your home. Understand the basics of how they work and how to safely work with them. Labeling circuits can help during repairs, ensuring you turn off the correct breaker.

Simple Fixes

Minor electrical repairs like replacing a light switch or fixing a loose outlet cover can often be handled as DIY tasks. Ensure the power is off before starting and follow step-by-step instructions carefully.

Replacing Fixtures and Outlets

Replacing light fixtures or electrical outlets can also be manageable for DIY enthusiasts. However, ensure compatibility with the wiring and fixtures. Turn off the power and follow installation instructions precisely.

Dealing with Tripped Breakers

Understanding why a breaker has tripped is important. If it’s due to overloading, redistribute the load among different circuits. If it keeps tripping, it might indicate a more serious issue that requires professional intervention.

DIY Limitations

Know when a repair is beyond your expertise. Complex electrical issues, rewiring, or handling main electrical panels should be left to licensed electricians to ensure safety and compliance with regulations.

Regular Maintenance

Regularly inspect electrical systems for signs of wear, loose connections, or frayed wires. Addressing minor issues promptly can prevent more significant problems down the line.

Educational Resources

Engage in learning about electrical repairs through reputable resources. Books, online guides, or educational videos can provide valuable insights into safe DIY electrical repairs.

Professional Consultation

When in doubt or dealing with potentially hazardous situations, always consult a professional electrician. Electrical systems are complex, and safety should never be compromised.

While some DIY electrical repairs are manageable, safety should never be overlooked. Knowing when to handle a repair and when to seek professional help ensures a safe and functional electrical system at home. Always prioritize safety and caution when dealing with any electrical issues.

DIY Plumbing Care: Essential Maintenance Tips

DIY Plumbing Care: Essential Maintenance Tips

DIY Plumbing Care: Essential Maintenance Tips

Maintaining your home’s plumbing system is crucial for preventing costly repairs and ensuring a smoothly functioning household. With some DIY know-how, you can tackle basic plumbing maintenance tasks effectively.

Regular Inspection Routine

Initiate a regular inspection routine for your plumbing. Check for leaks under sinks, around toilets, and along exposed pipes. Detecting and addressing leaks early can prevent water damage and save you from major repairs.

Winterization Practices

Before winter sets in, protect your pipes from freezing temperatures. Insulate exposed pipes, disconnect and drain outdoor hoses, and consider using heat tape or pipe sleeves to prevent freezing and potential bursting.

For more insights into DIY Plumbing Maintenance, visit nolvamedblog.com. This resource offers comprehensive guidance on maintaining your home’s plumbing system.

Caring for Drains

Prevent clogs by being mindful of what goes down your drains. Use drain catchers or strainers to prevent hair, food particles, and other debris from clogging drains. Regularly flush drains with hot water or a mixture of vinegar and baking soda to keep them clear.

Seal Maintenance

Inspect and maintain seals around faucets, toilets, and tubs. Worn-out seals can lead to leaks, so replacing them promptly can prevent water wastage and potential water damage.

Addressing Minor Repairs Promptly

Small leaks or drips may seem insignificant, but they can indicate underlying issues. Address minor leaks promptly to prevent them from turning into major plumbing problems that require extensive repairs.

Testing Water Pressure

Check your home’s water pressure regularly. High water pressure can strain pipes and fixtures, leading to leaks or bursts. Use a pressure gauge to test the pressure and install a pressure regulator if necessary to maintain optimal levels.

Maintaining Water Heater

Regularly flush your water heater to remove sediment buildup, which can affect its efficiency and lifespan. Check for leaks or signs of corrosion and consult a professional if you notice any issues.

Knowledge and Tool Preparation

Educate yourself about your plumbing system and keep essential tools handy. Understand the location of shut-off valves and how to use them in case of emergencies. Having the necessary tools can enable you to tackle minor plumbing tasks confidently.

Professional Consultation

While DIY maintenance is valuable, some issues may require professional expertise. Don’t hesitate to call a plumber for complex problems or if you’re unsure about handling a situation.

By incorporating these DIY plumbing maintenance practices into your routine, you can ensure a well-maintained plumbing system and minimize the risk of plumbing emergencies. Regular care and attention to your home’s plumbing system can save you both time and money in the long run.